Everything I have to say about this technique is in the video =) also left you a visual step by step in case you need it to quickly remember you one of the steps.
I hope you enjoy it and it helps you in your next project!
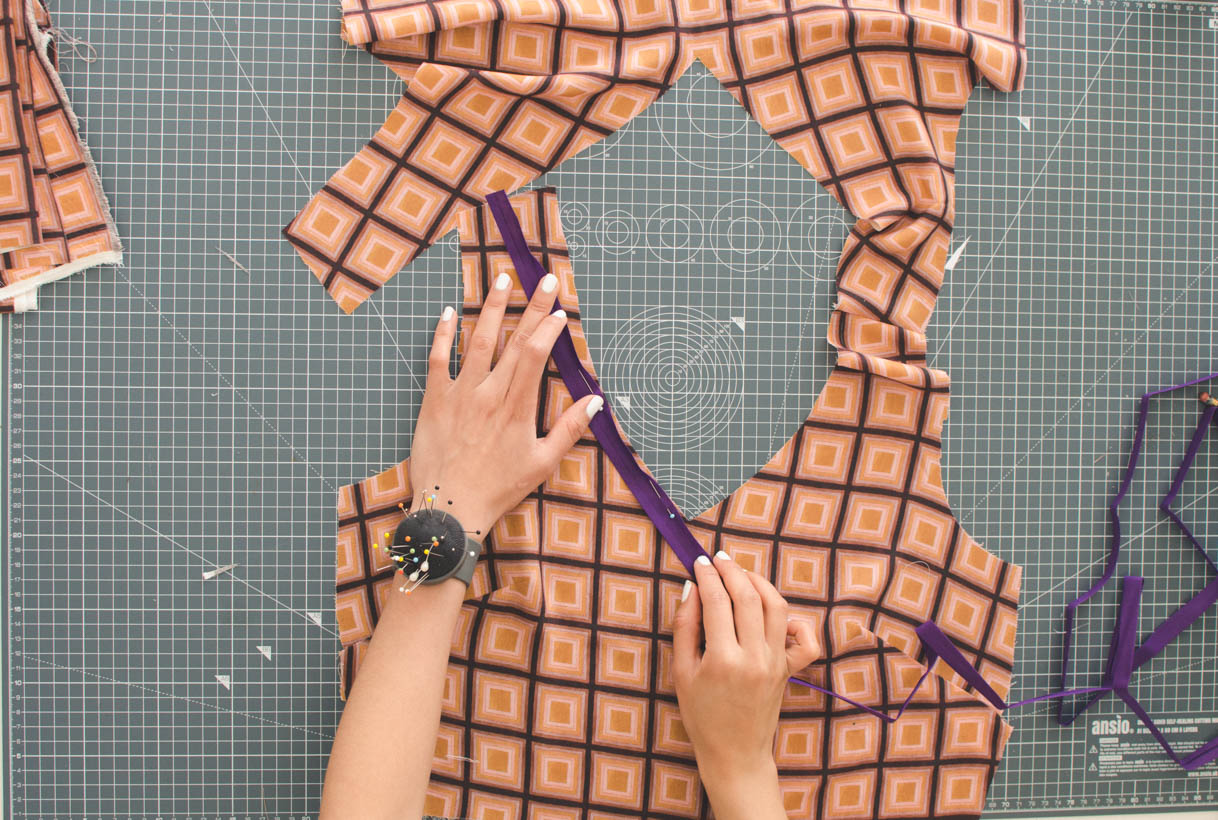
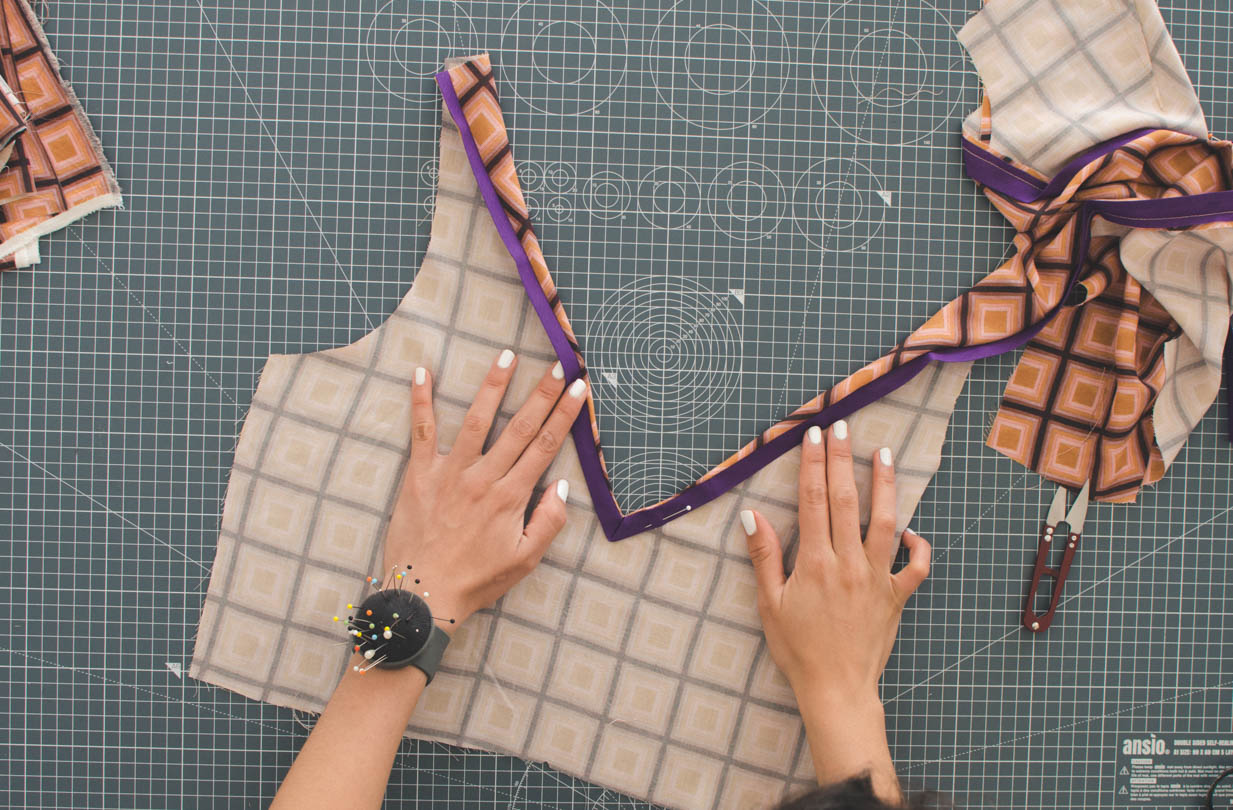
1- Sew one of the shoulders and face the bias to the front of the piece starting with the shoulder that is not attached.
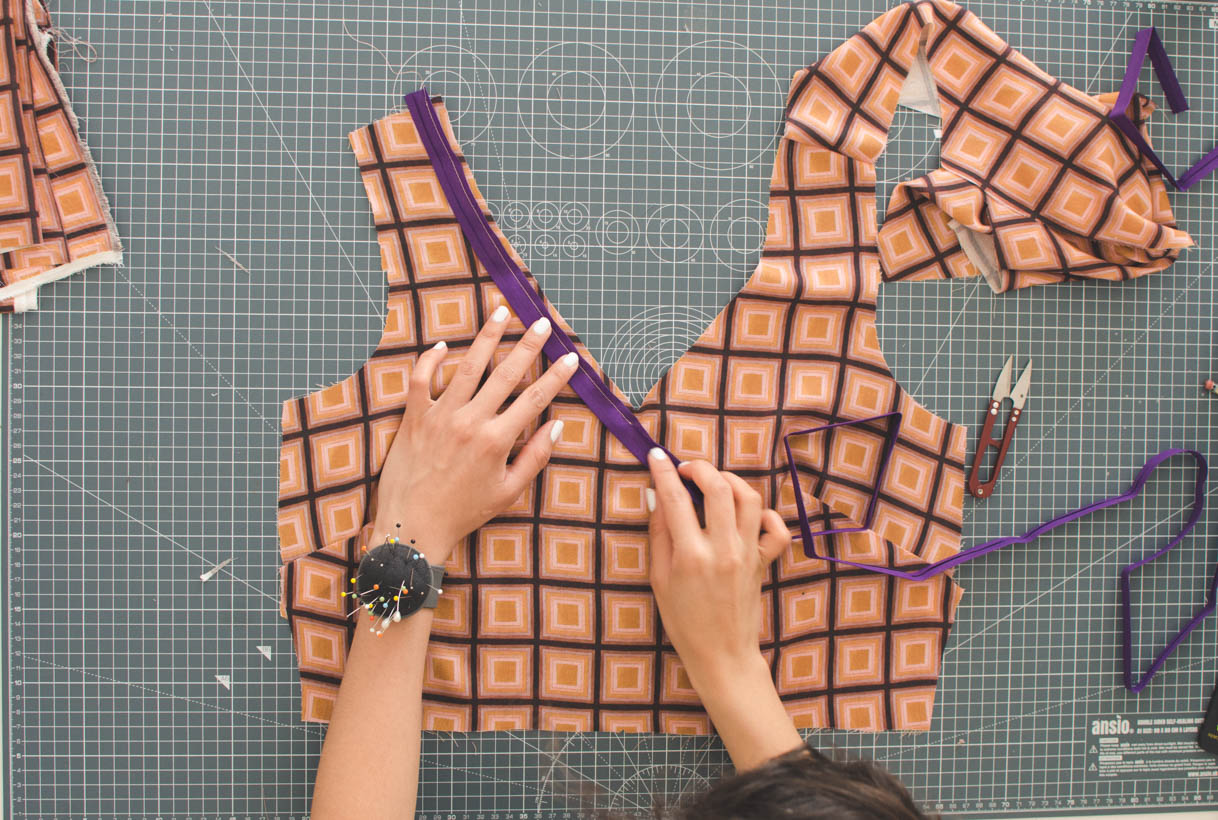
2-Sew the bias until the point parallel to the corner of the neck, reinforcing at the end.
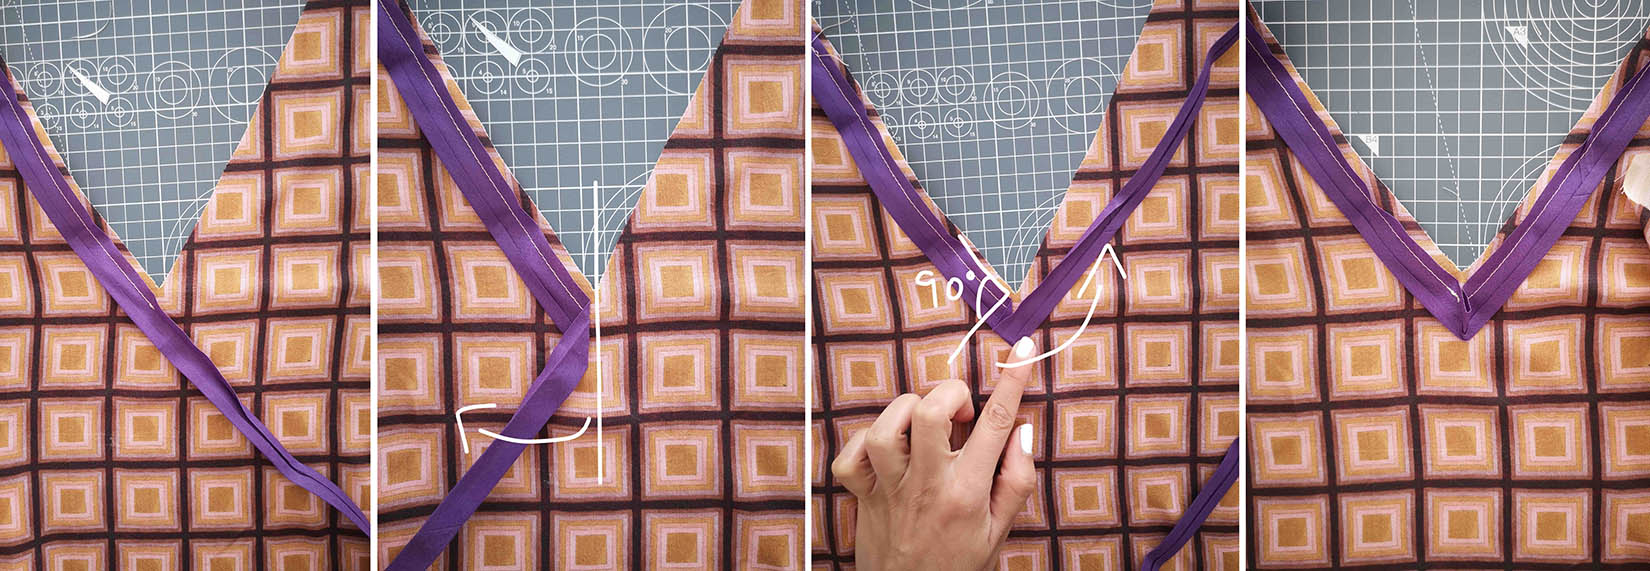
3-This is the most important step, if you have difficulties to understand it, do not miss it in the video. In summary, you fold the bias to the side and then upwards achieving an angle of 90º, continue sewing from the point where we finished in the previous step without touching that fold.
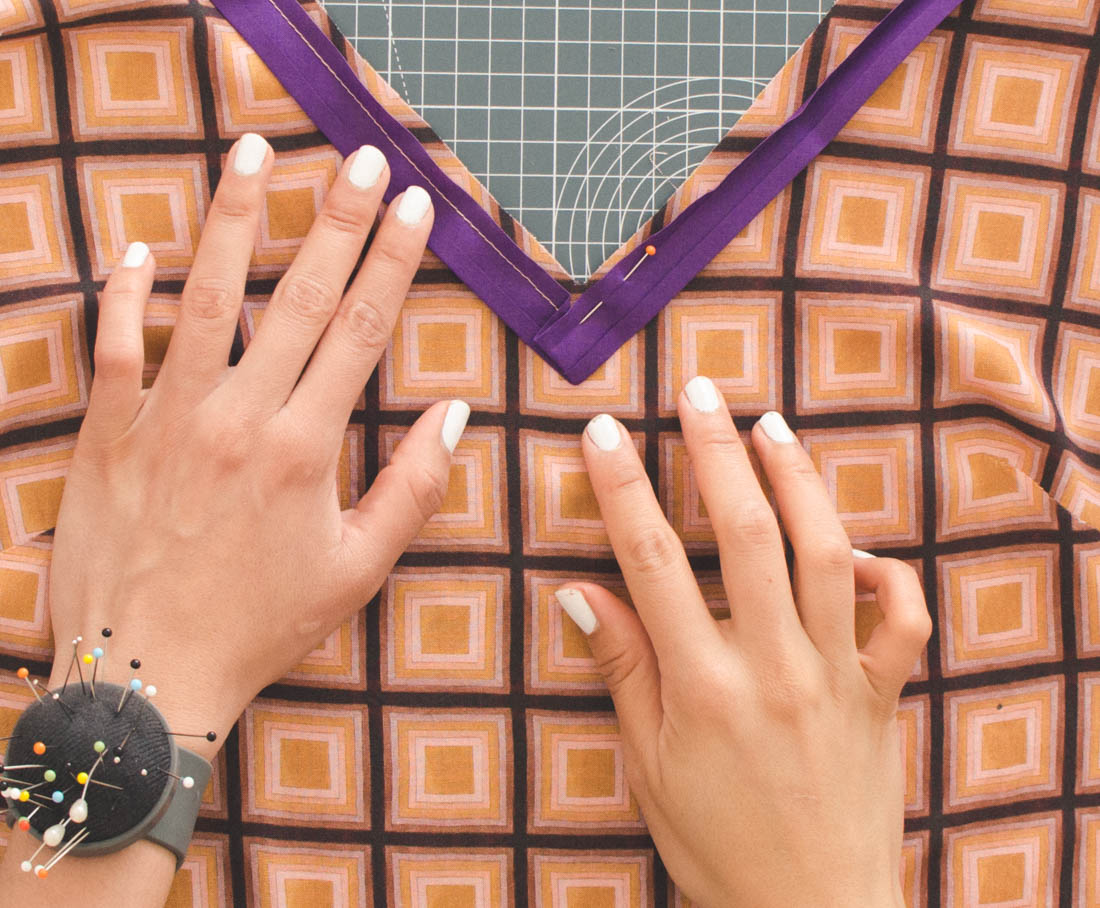
4-Flip the bias to the back and press very well.
5-Sew the bias around the edge to close it.
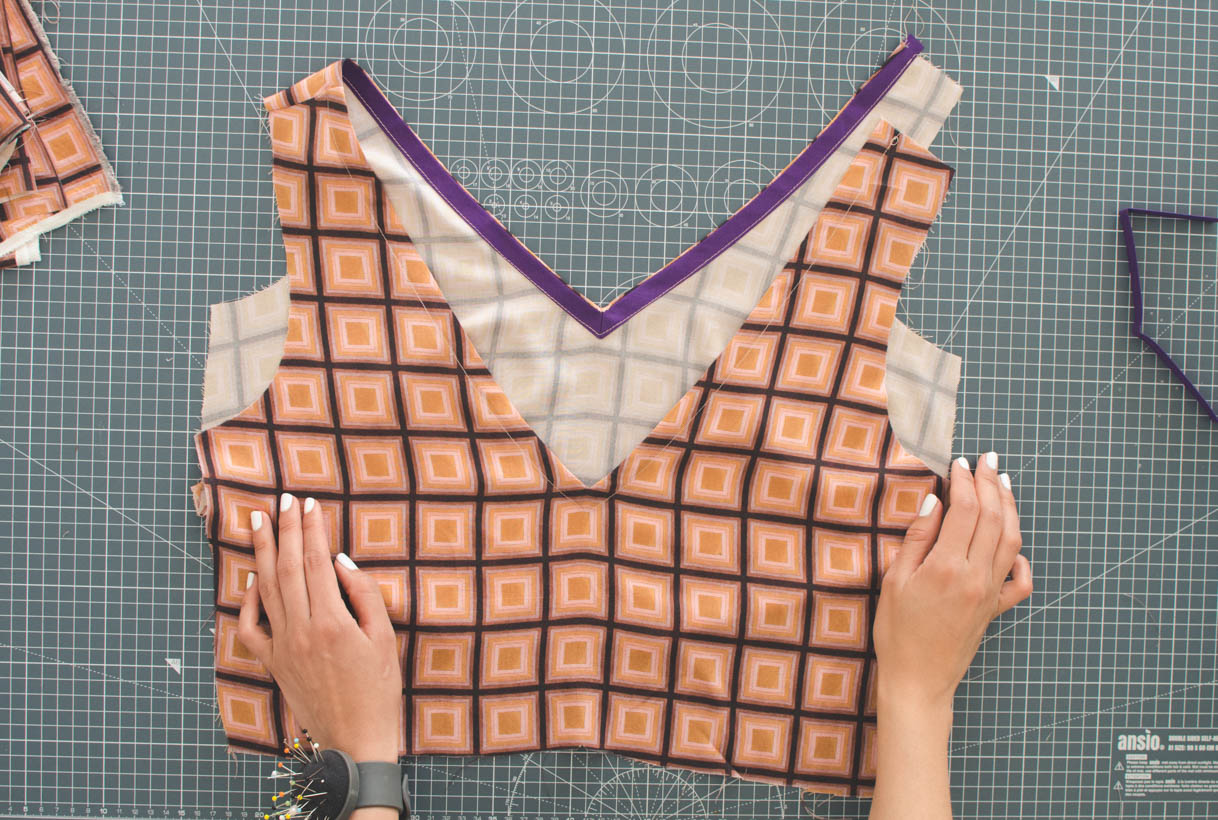
6-Finish by closing the shoulder that we left open in the first step =)

Don’t miss the video for all the details =)
Hugs,
Damar